Open time: 8 : 00 AM - 5 : 30 PM (Monday - Saturday)
Open time: 8 : 00 AM - 5 : 30 PM (Monday - Saturday)
Available on back-order
Expands measurement range while reducing workpiece interference Mitutoyo’s newly designed detector arm lowers workpiece interference while expanding the measurement range in the Z1 axis (detector).
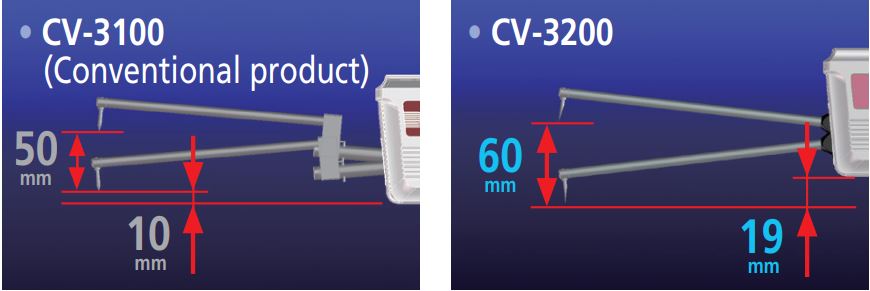
The detector includes a safety mechanism (auto stop upon collision) to assure measurement safety even during high-speed movement. If the arm is removed or shifts during measurement, the safety mechanism is triggered and stops the machine.

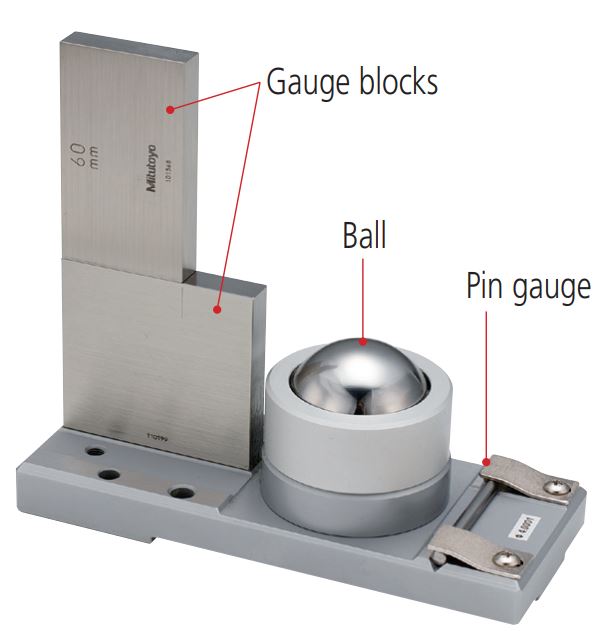
The CV-3200 Series provides a dedicated calibration gage that lets you carry out precise work such as calibrating the Z1-axis gain, symmetry, and stylus radius in a single operation. Calibration of upward measurement is also possible by using Mitutoyo’s optional calibration stage.
Calibration kit for CV-3200 series
The CV-3200 Series features a built-in precision arc scale on the Z1 axis (detector) that allows the arc trajectory of the stylus tip to be read directly, minimizing the detector mechanism error and enabling precision, high-resolution measurement. On the X axis (driver) is a linear scale, allowing high-accuracy full-stroke measurement.
Accuracy ————————————————————————
Z1 axis (detector unit): ± (1.4 + | 2H | /100) μm
H = Measurement height from the horizontal position (mm)
X axis (drive unit): ±(0.8+0.01L) µm*1
L = drive length (mm)
Resolution ————————————————————————
Z1 axis (detector unit): 0.04µm
X axis (drive unit): 0.05µm
*1 These specifications apply to the CV-3200S4/H4/W4. For specifications of other products in the series, see Specifications on page 14.
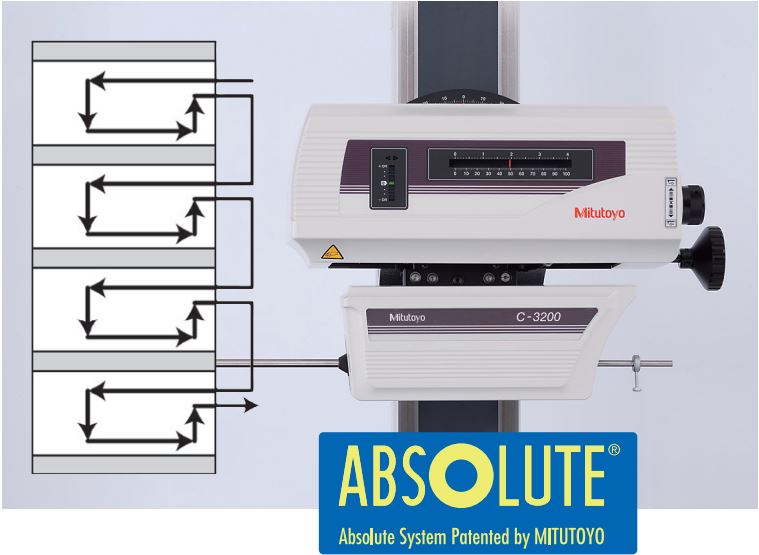
Incorporation of an ABS scale in the Z2 axis eliminates the need for wearisome origin point re-setting conventionally required for every step of repeated measurements over stepped or multiple sections.
Small holes and inclined planes can be efficiently measured using the inclined X-axis drive unit and fine-feed handles on the X and Z2 axes.
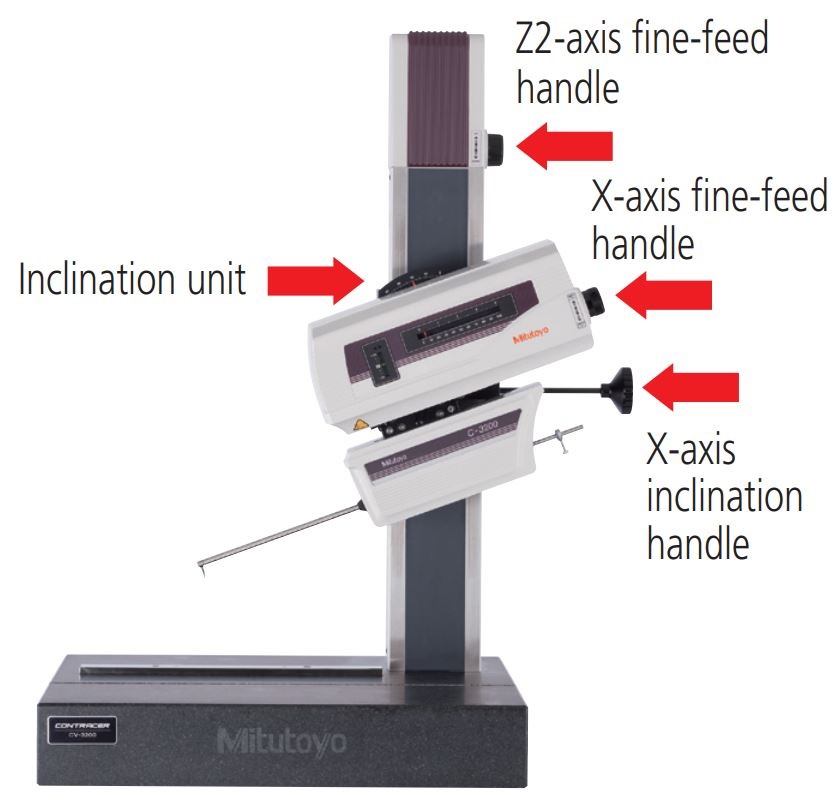
With the support for a wide range of optional peripherals designed for use with the CNC Form Measuring Unit enables simplified CNC measurement.
• Ø1-axis Rotary unit: Automatic circular-form measurement
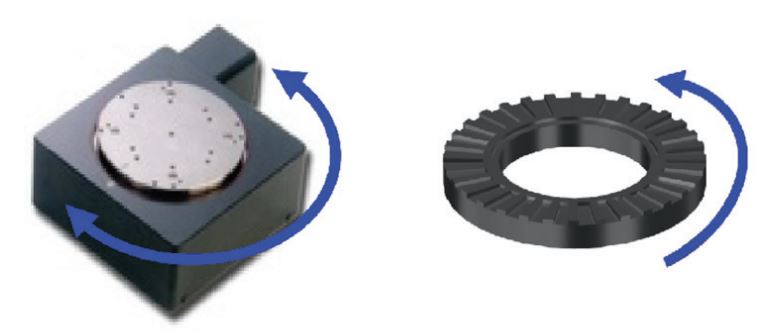
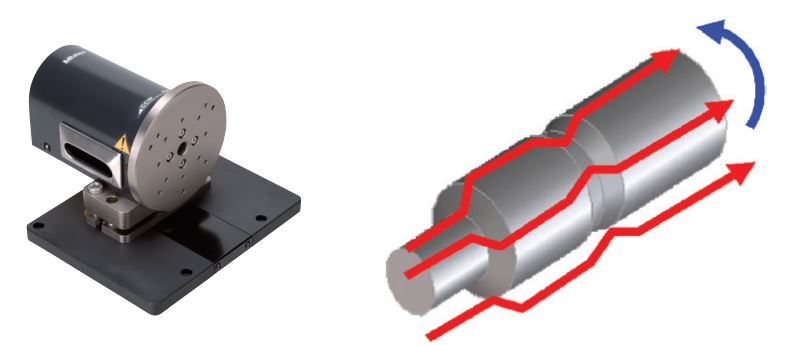
• 2-axis Rotary unit: Automatic multiple-section continuous measurement
| Model | CV-3200H4 | ||
| Measuring range | X axis | 100mm | |
| Z2 axis (column) travel range 3 | 60mm (±30mm in horizontal situation) | ||
| Z2 axis (column) travel range 3 | 500mm | ||
| Detector (Z1 axis (detector unit)) | Scale unit | Arc scale | |
| Resolution | 0.04µm | ||
| Stylus up/down motion | Arc movement | ||
| Measuring direction | Both pulling and pushing directions | ||
| Measuring face direction | Downward or upward | ||
| Measuring force | 30mN (by adjusting weight) | ||
| Stylus traceable range | Ascent 77°, Descent 83° (with one-sided cut stylus: standard accessory) | ||
| Drive unit | Scale unit | X axis | Separate type linear encoder |
| Z2 axis (column) | ABS encoder | ||
| Resolution | X axis | 0.05µm | |
| Z2 axis (column) | 1µm | ||
| Drive speed | X axis | 0 – 80mm/s and manual operation | |
| Z2 axis (column) | 0 – 30mm/s and manual operation | ||
| Measuring speed | X axis | 0.02 – 20mm/s | |
| Straightness (when the X axis is horizontal) | X axis | 0.8µm/100mm | |
| X axis inclination angle | X axis | ±45° | |
| Accuracy (20°C) | CV-3200 | X axis | ±(0.8 + 0.01L) µm L = Drive length (mm) Wide range: 1.8µm/100mm Narrow range: 1.05µm/25mm |
| Z1 axis (column) | ± (1.4 + | 2H | /100) µm H = Measurement height from the horizontal position | ||
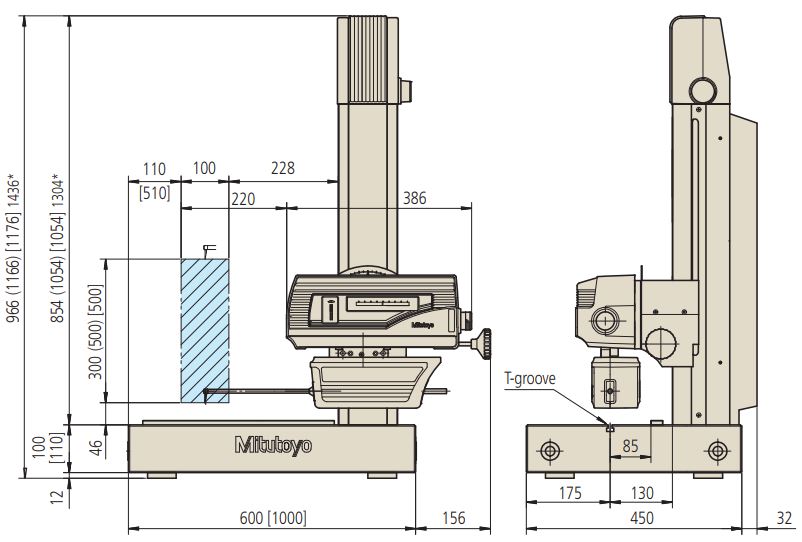
| External dimensions (W×D×H) | Main unit | 756×482 ×1166mm | |
| Controller | 221×344×490mm | ||
| Remote box | 248×102×62.2mm | ||
| Mass | Main unit | 150kg | |
| Controller | 14kg | ||
| Remote box | 0.9kg | ||
| Operating temperature range | 15 – 25°C (within ±1K temperature fluctuation on calibration and measurement) | ||
| Operating humidity range | 20 – 80%RH (with no condensation) | ||
| Storage temperature range | −10 to 50°C | ||
| Storage humidity range | 5 – 90%RH (with no condensation) | ||
