Open time: 8 : 00 AM - 5 : 30 PM (Monday - Saturday)
Open time: 8 : 00 AM - 5 : 30 PM (Monday - Saturday)
This is a highly accurate, precision form measuring system developed to give you the highest accuracy as well as high flexibility and analytical capability.
Available on back-order
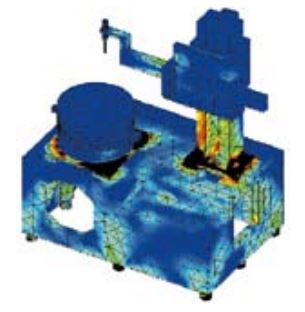
For a measurement system to be able to achieve high accuracy, the base, which forms the foundation of the system, must be completely rigid. Therefore, we utilized FEM structural analysis simulation to thoroughly analyze the base and its application. The result is the development of a high-rigidity base.

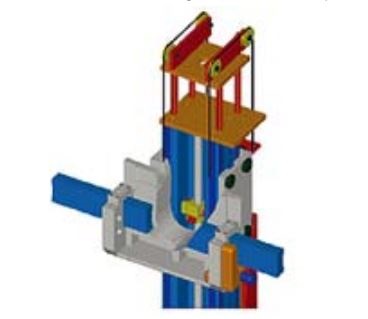
Attaining the ultimate level of improvement in the manufacturing accuracy of the column guide surface, which is critical for achieving perfect straightness, and adopting Mitutoyo’s proprietary system and mechanisms have led to the achievement of the ultra-high column straightness of 0.05μm/100mm (in narrow range)

The system is supplied as standard with the Automatic Adjustment Table (A.A.T.) positioning and leveling function, freeing the operator from the task of centering and leveling the workpiece. High- precision glass encoders are used to reduce positioning errors and achieve high-speed automatic centering/leveling, which contributes greatly to reducing the total measurement time from workpiece setting to workpiece measurement.
|
Model:
|
RA-H5200AS
|
|
Centering/leveling adjustment 1*:
|
AAT
|
|
Vertical travel:
|
350 mm
|
|
Max. probing diameter:
|
400 mm
|
|
Max. workpiece Ø:
|
680 mm
|
|
Max. turntable loading
[kg]: |
65
|
|
Turntable:
|
|
|
Rotational accuracy:
|
Radial:
(0,02+0,00035H) µm H: Measuring height from turntable surface (mm) Axial: (0,02+0,00035X) µm X: Radial distance from center (mm) |
|
Rotational speed:
|
2, 4, 6, 10 rpm
Auto centering: 20 rpm |
|
Max. probing Ø:
|
400 mm
|
|
Max. turntable loading:
|
65 kg kg
|
|
Centering range:
|
±5 mm
|
|
Leveling range:
|
±1°
|
|
Vertical column:
|
|
|
Max. probing height:
|
AS : 350 mm
AH: 550 mm above turntable surface |
|
Max. probing depth:
|
85 mm (minimum ID : ø32 mm)
50 mm (minimum ID : ø7 mm) |
|
Straightness:
|
AS / AH : 0.05 µm / 100 mm
AS : 0.14 µm / 350 mm AH : 0.2 µm / 550 mm |
|
Parallelism with rotation center:
|
AS : 0.2 µm / 350 mm
AH : 0.32 µm / 550 mm |
|
Horizontal axis:
|
|
|
Perpendicularity to rotation center:
|
0.5 µm / 200 mm
|
|
Software: |
ROUNDPAK
FORMTRACEPAK-AP |
|
Optional accessories:
|
Other optional and standard accessories are listed later in this section for accessories and styli.
|
|
Max. probing Ø :
|
400 mm
|
|
Max. workpiece ø:
|
680 – 680 mm
|